Weaving is an ancient craft and can be used to create amazing functional and decorative work. However, at its most basic it’s also really easy to get started so in this post we’ll show you how to make a simple loom from cardboard and get you weaving! We’re going to work with fairly short lengths of yarn for this project to give us a fringed edge.
You will need:

- Cardboard (we’re using a 15 x 15 cm square)
- Scraps of yarn, ribbon and fabric (you can use up all sorts of odds and ends for this!)
- String or strong, non stretchy thread
- Bodkin or large, blunt needle (optional)
- Scissors
- Ruler
- Pen or pencil
Step 1.

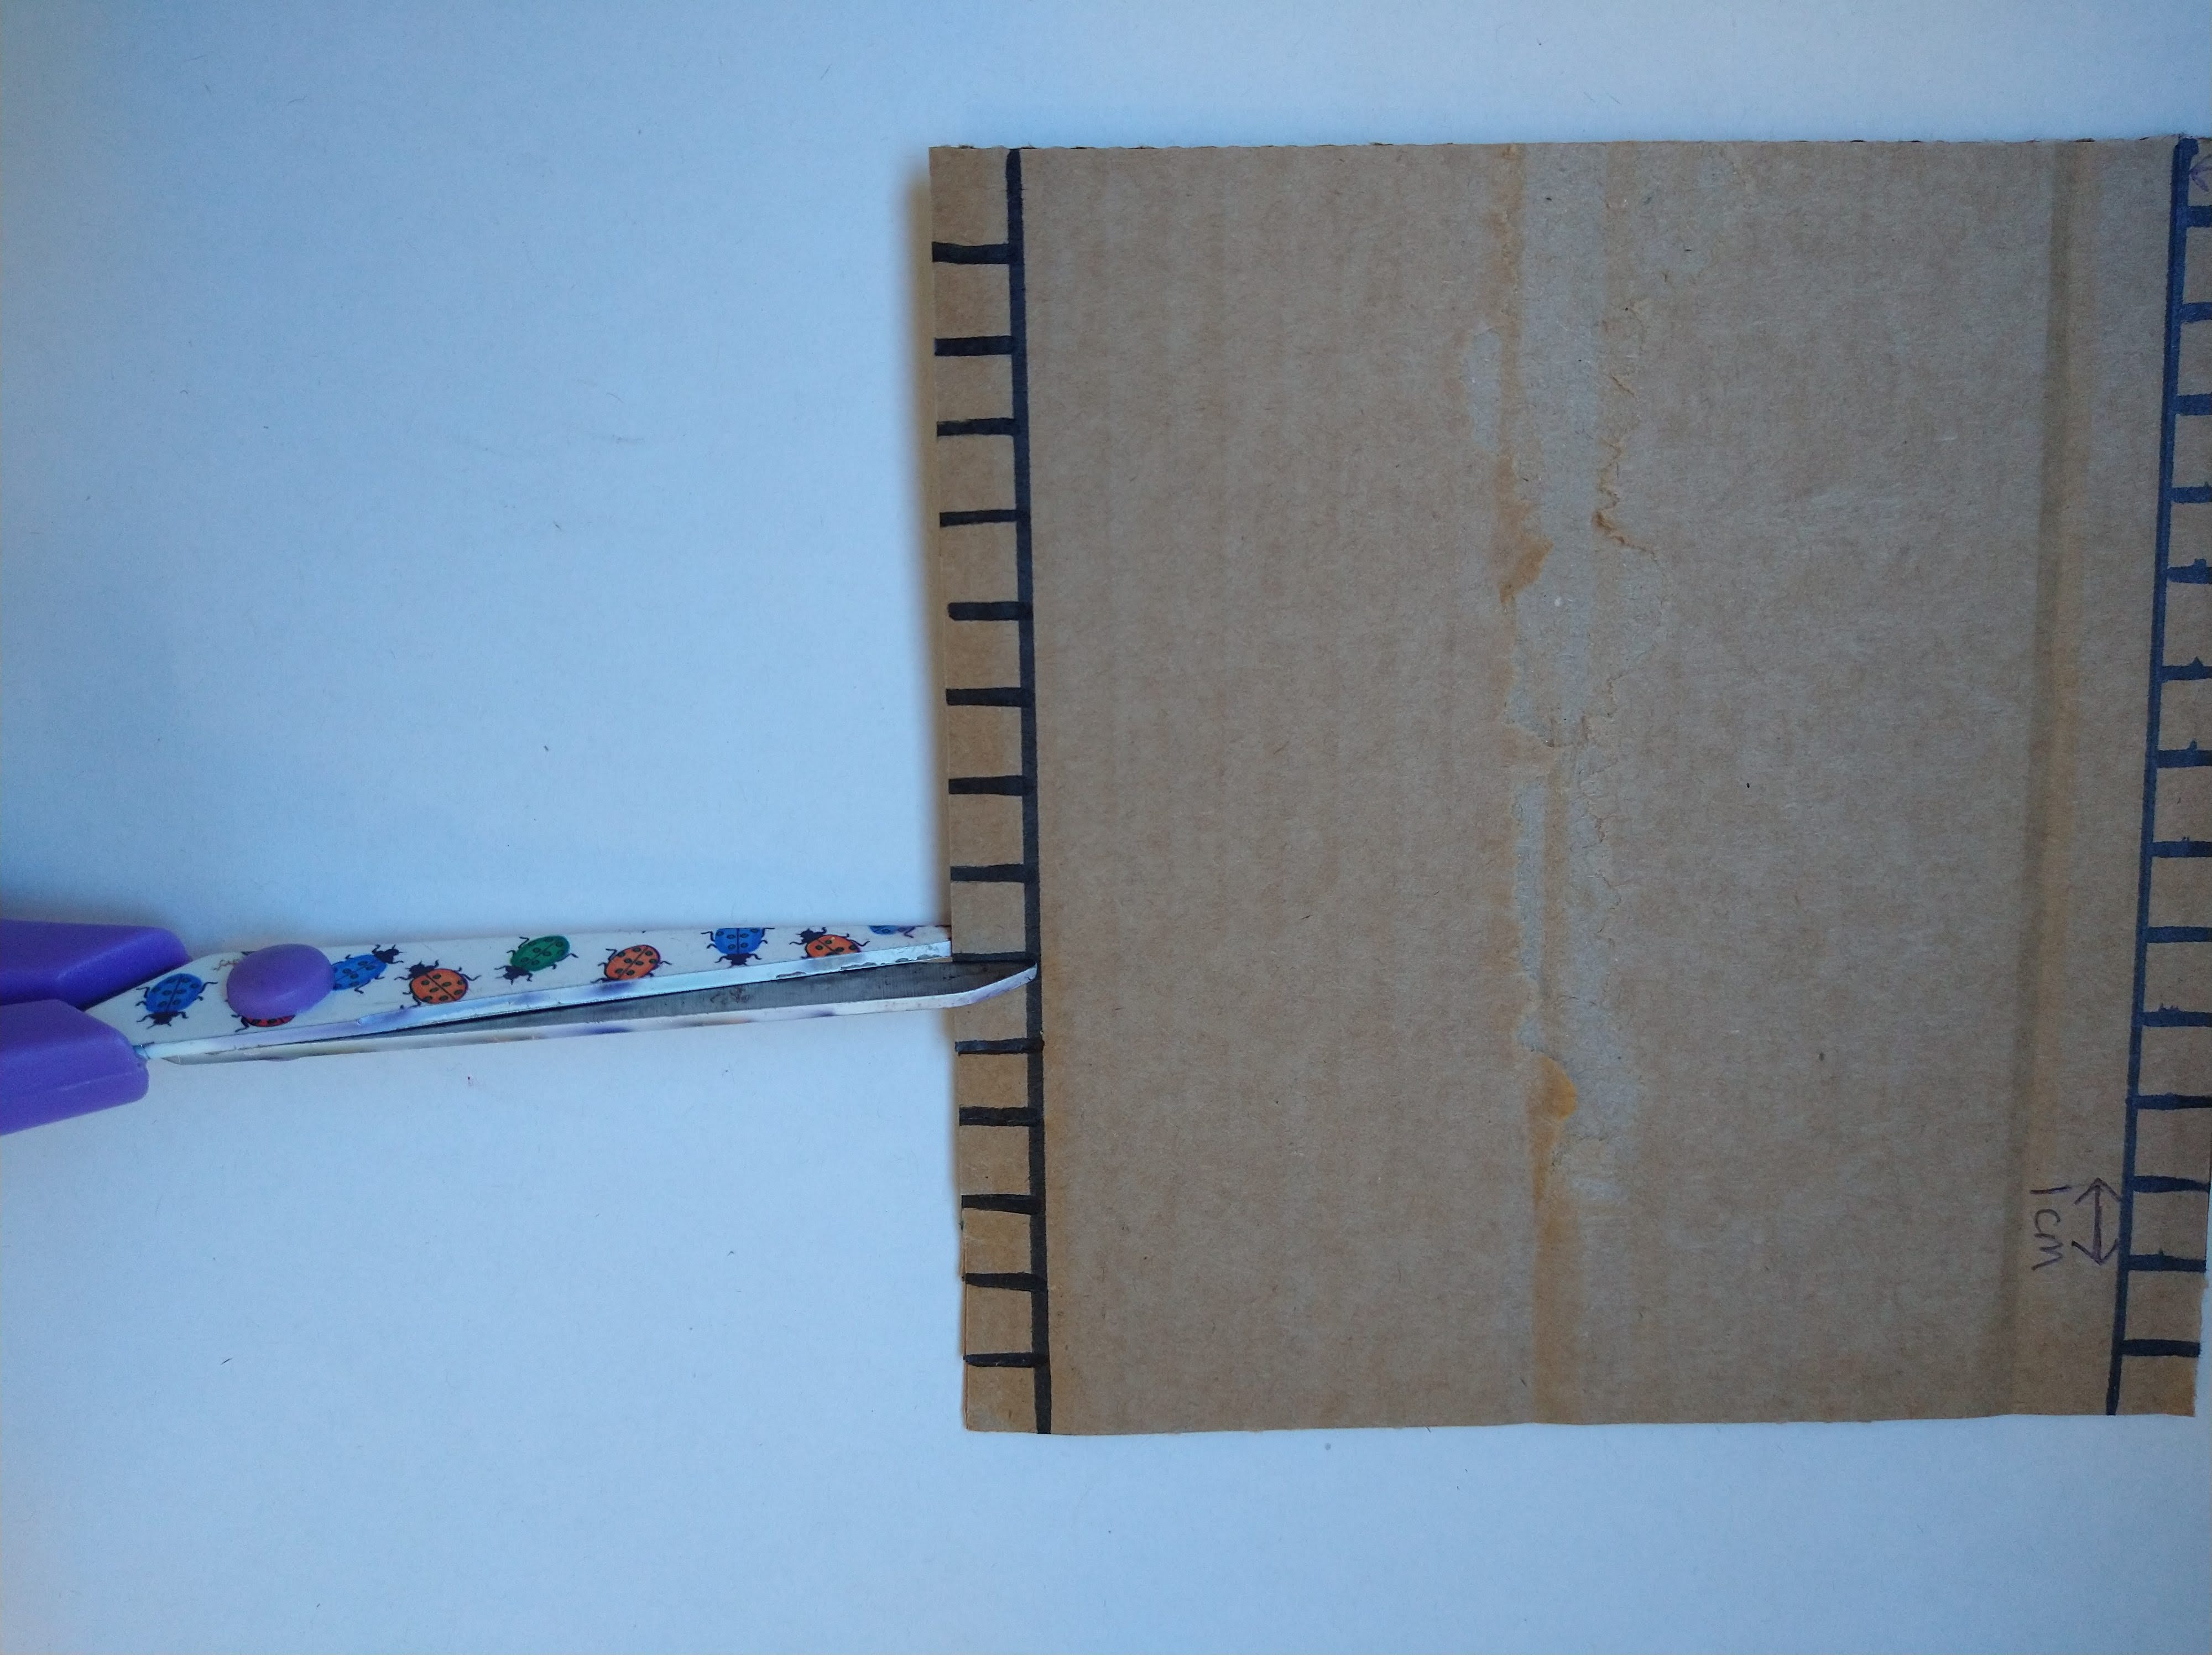

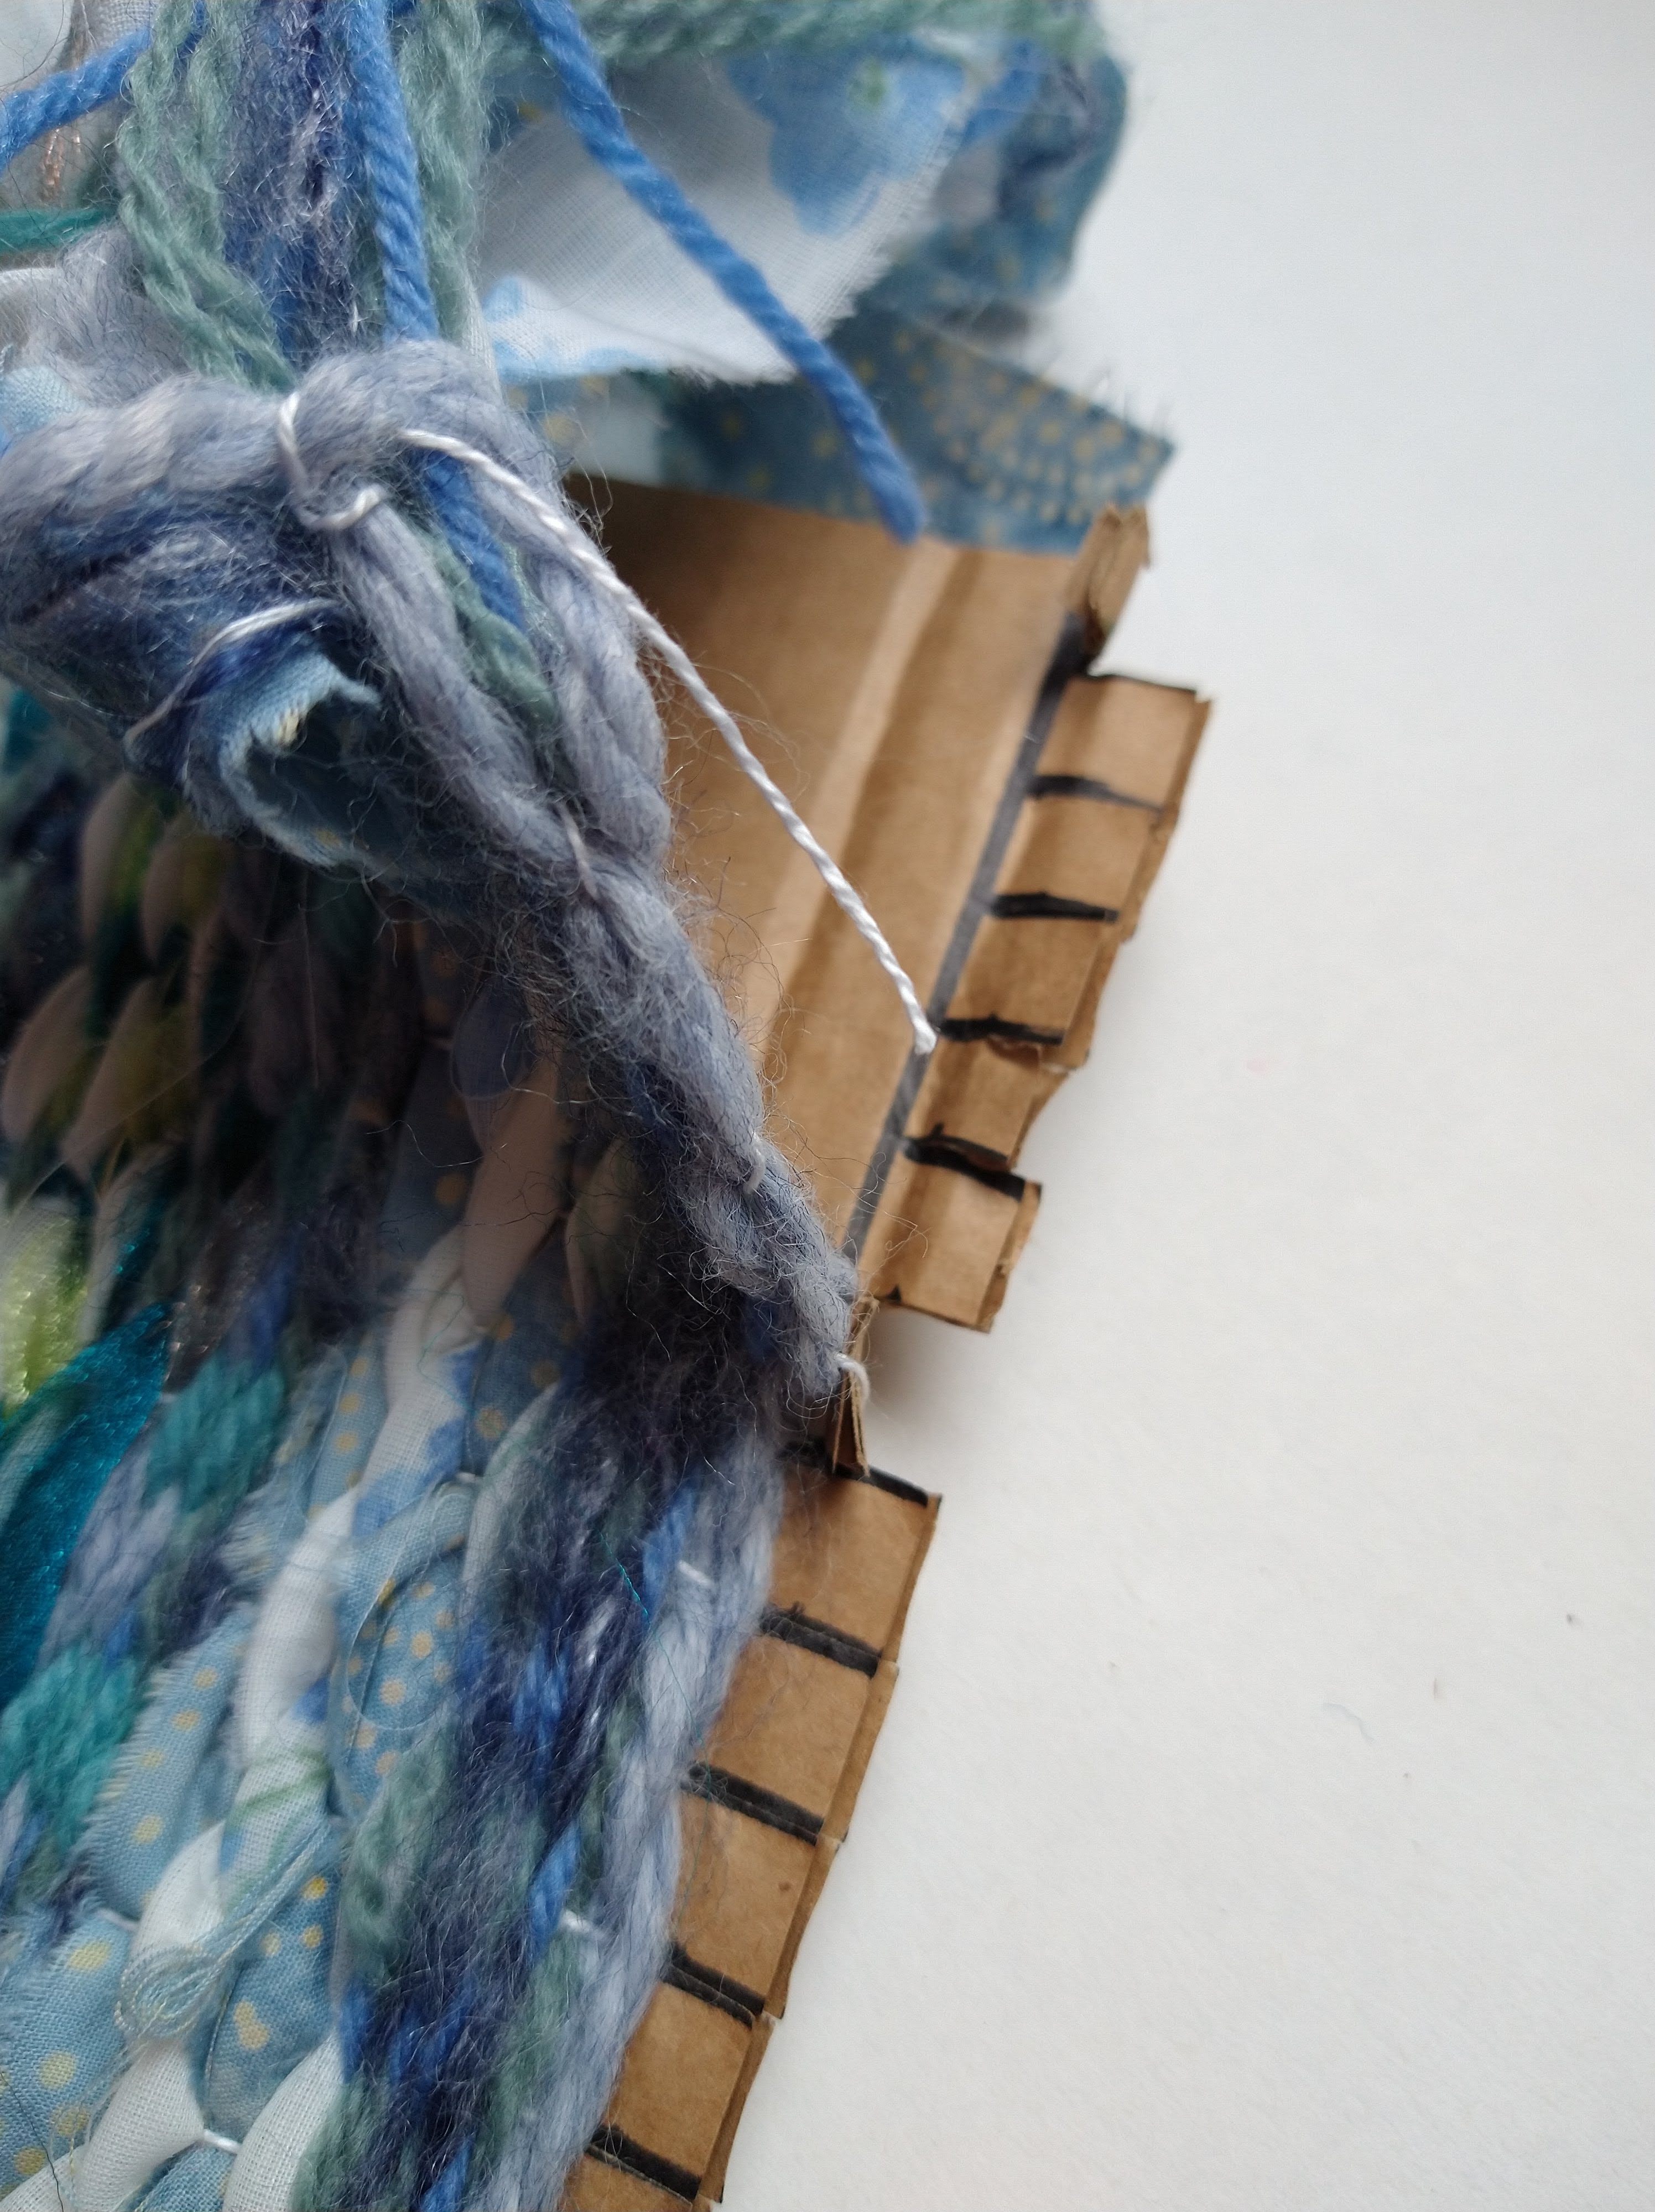
To start with we’re going to make our loom; mark a 1 cm line along two opposite edges of your square and mark along this line at 1 cm intervals. Now cut along the edges to the line you marked at the 1 cm intervals.
Step 2.

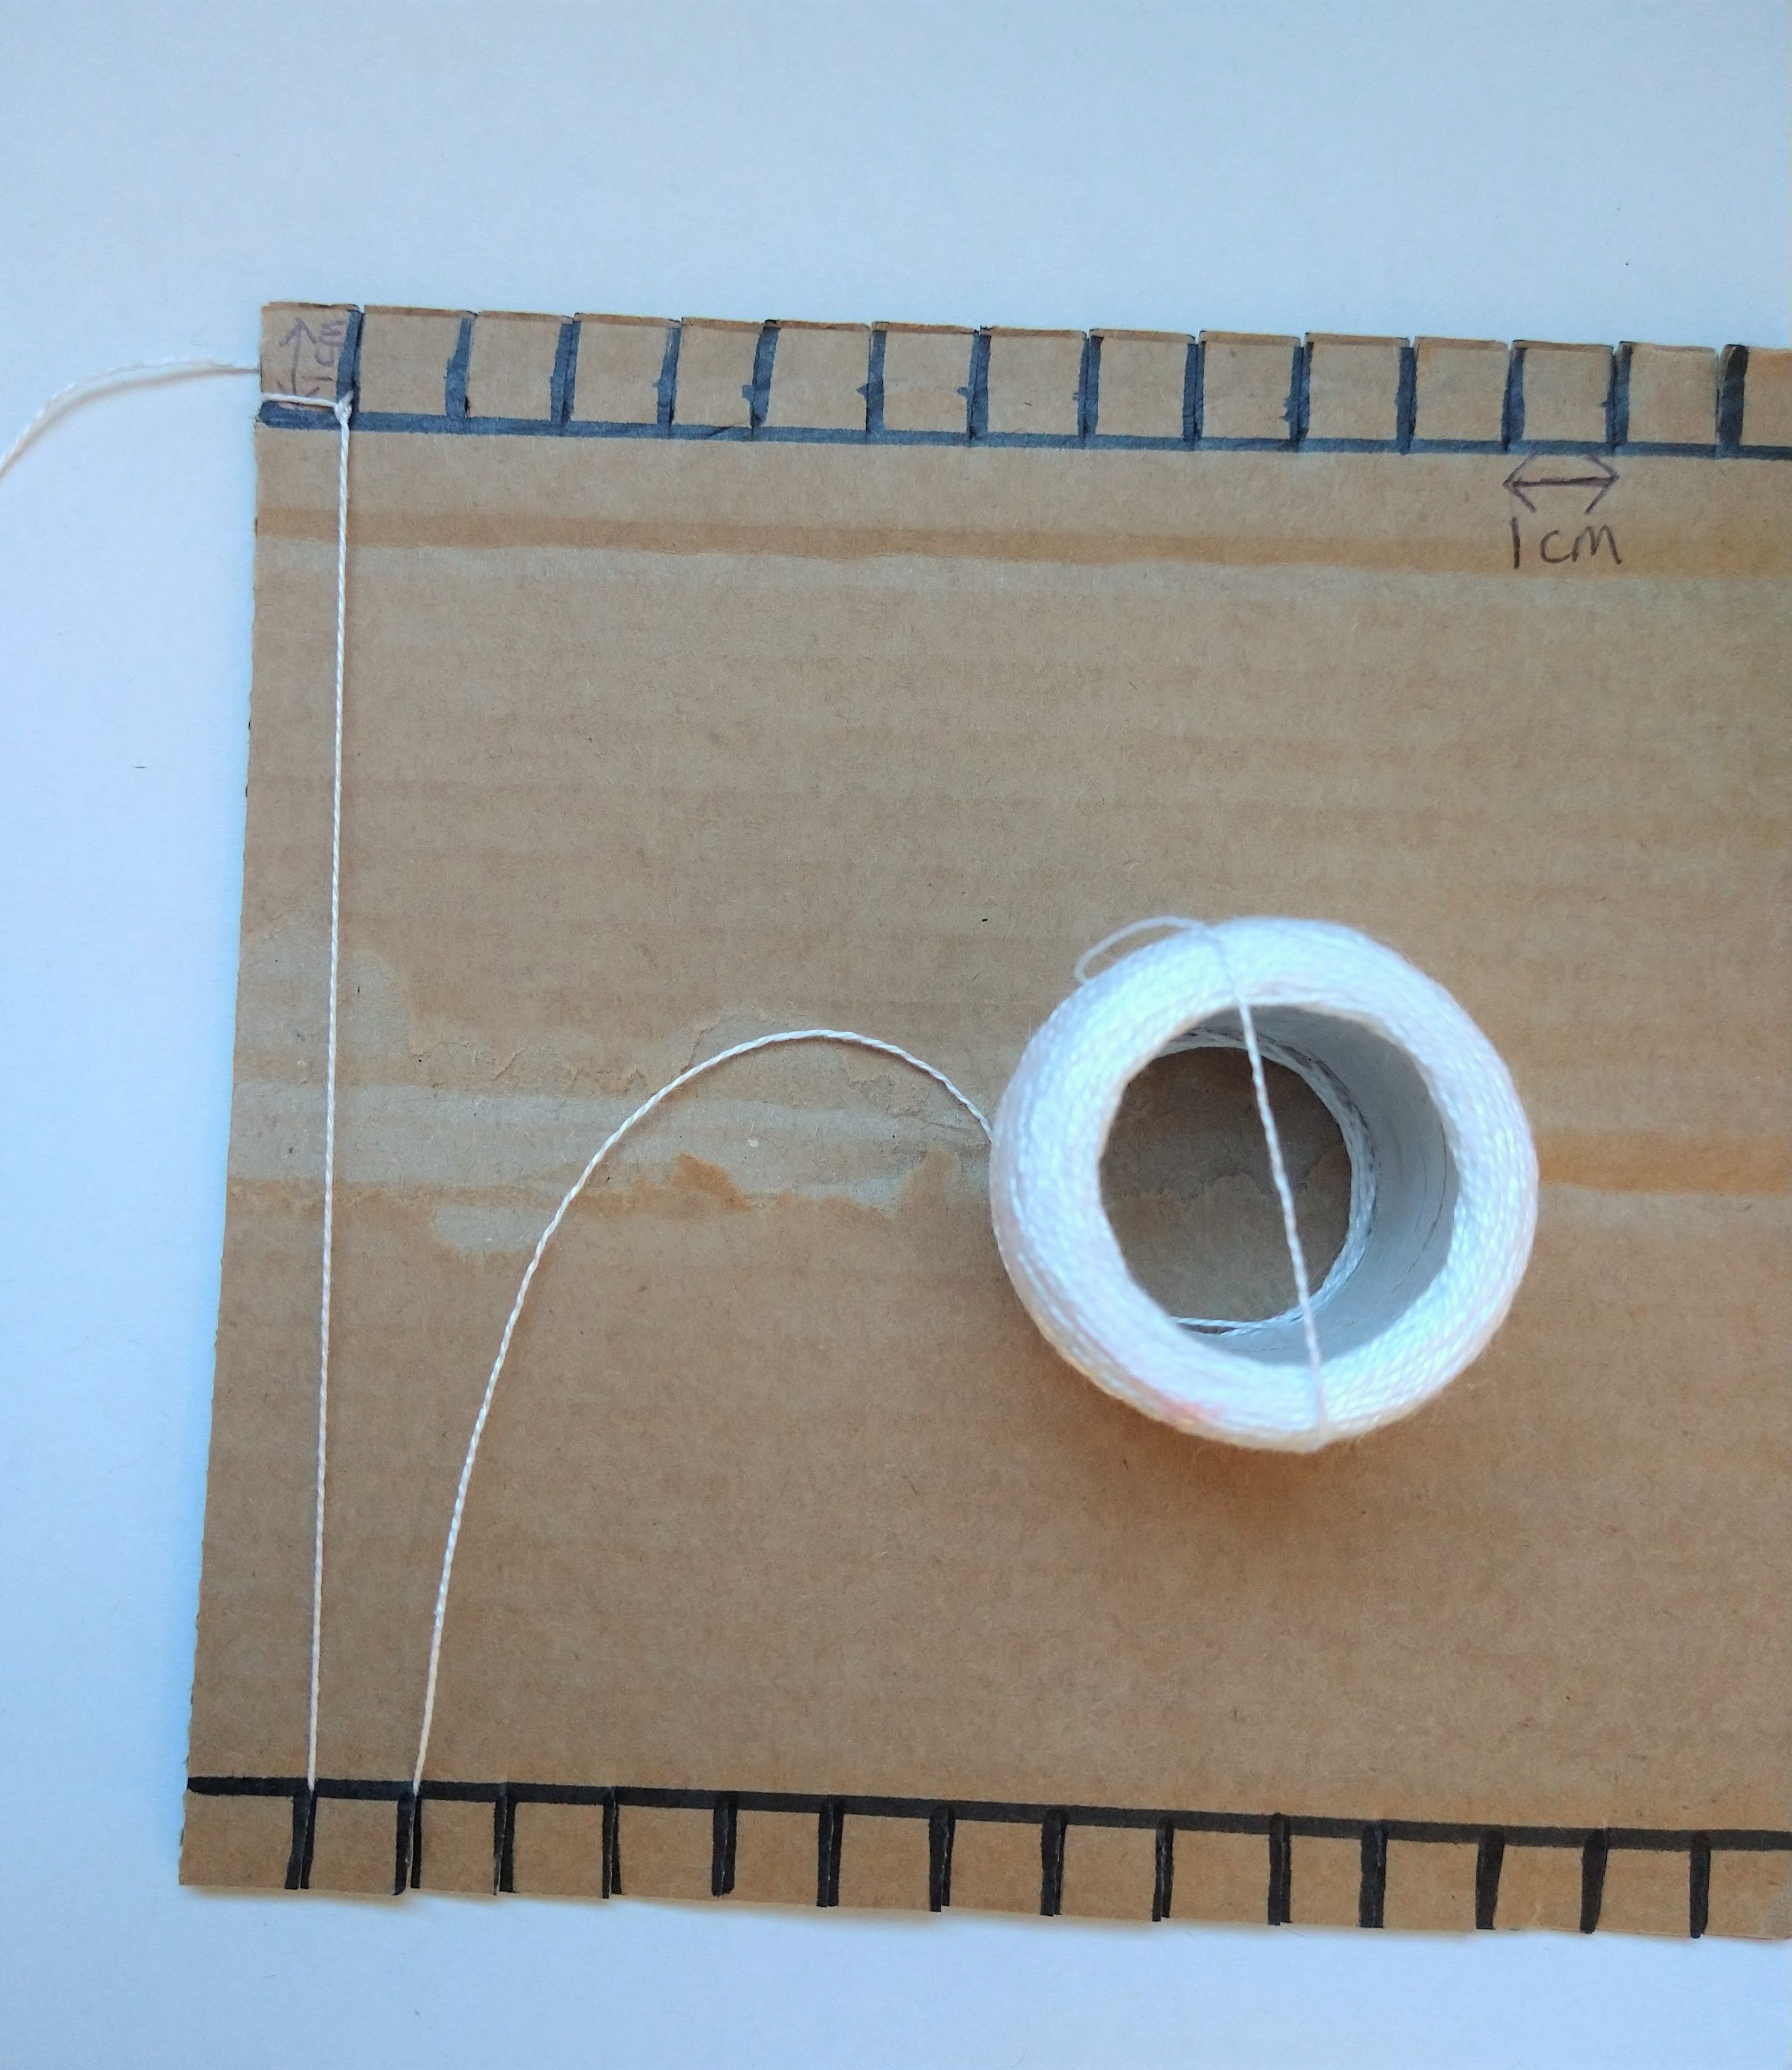
The next step is to warp the loom. We’re going to use the string for this bit, the thread you choose for the warp needs to be strong and not stretchy. Start at one edge by tying the string around the first ‘post’ of the top of the loom.
Step 3.


Now we’re going to take the string down to the opposite edge, around the back of the ‘post’ below and back up, around the next ‘post’ and back down. Keep going like this all the way along. When you get to the last ‘post’ tie the string off. You need the string to be quite taut but not so tight that it bends the cardboard.
Step 4.

We’ve made our loom so now we can start weaving. Cut a piece of yarn about 5 cm wider than your loom (so in our case this was 20cm.)
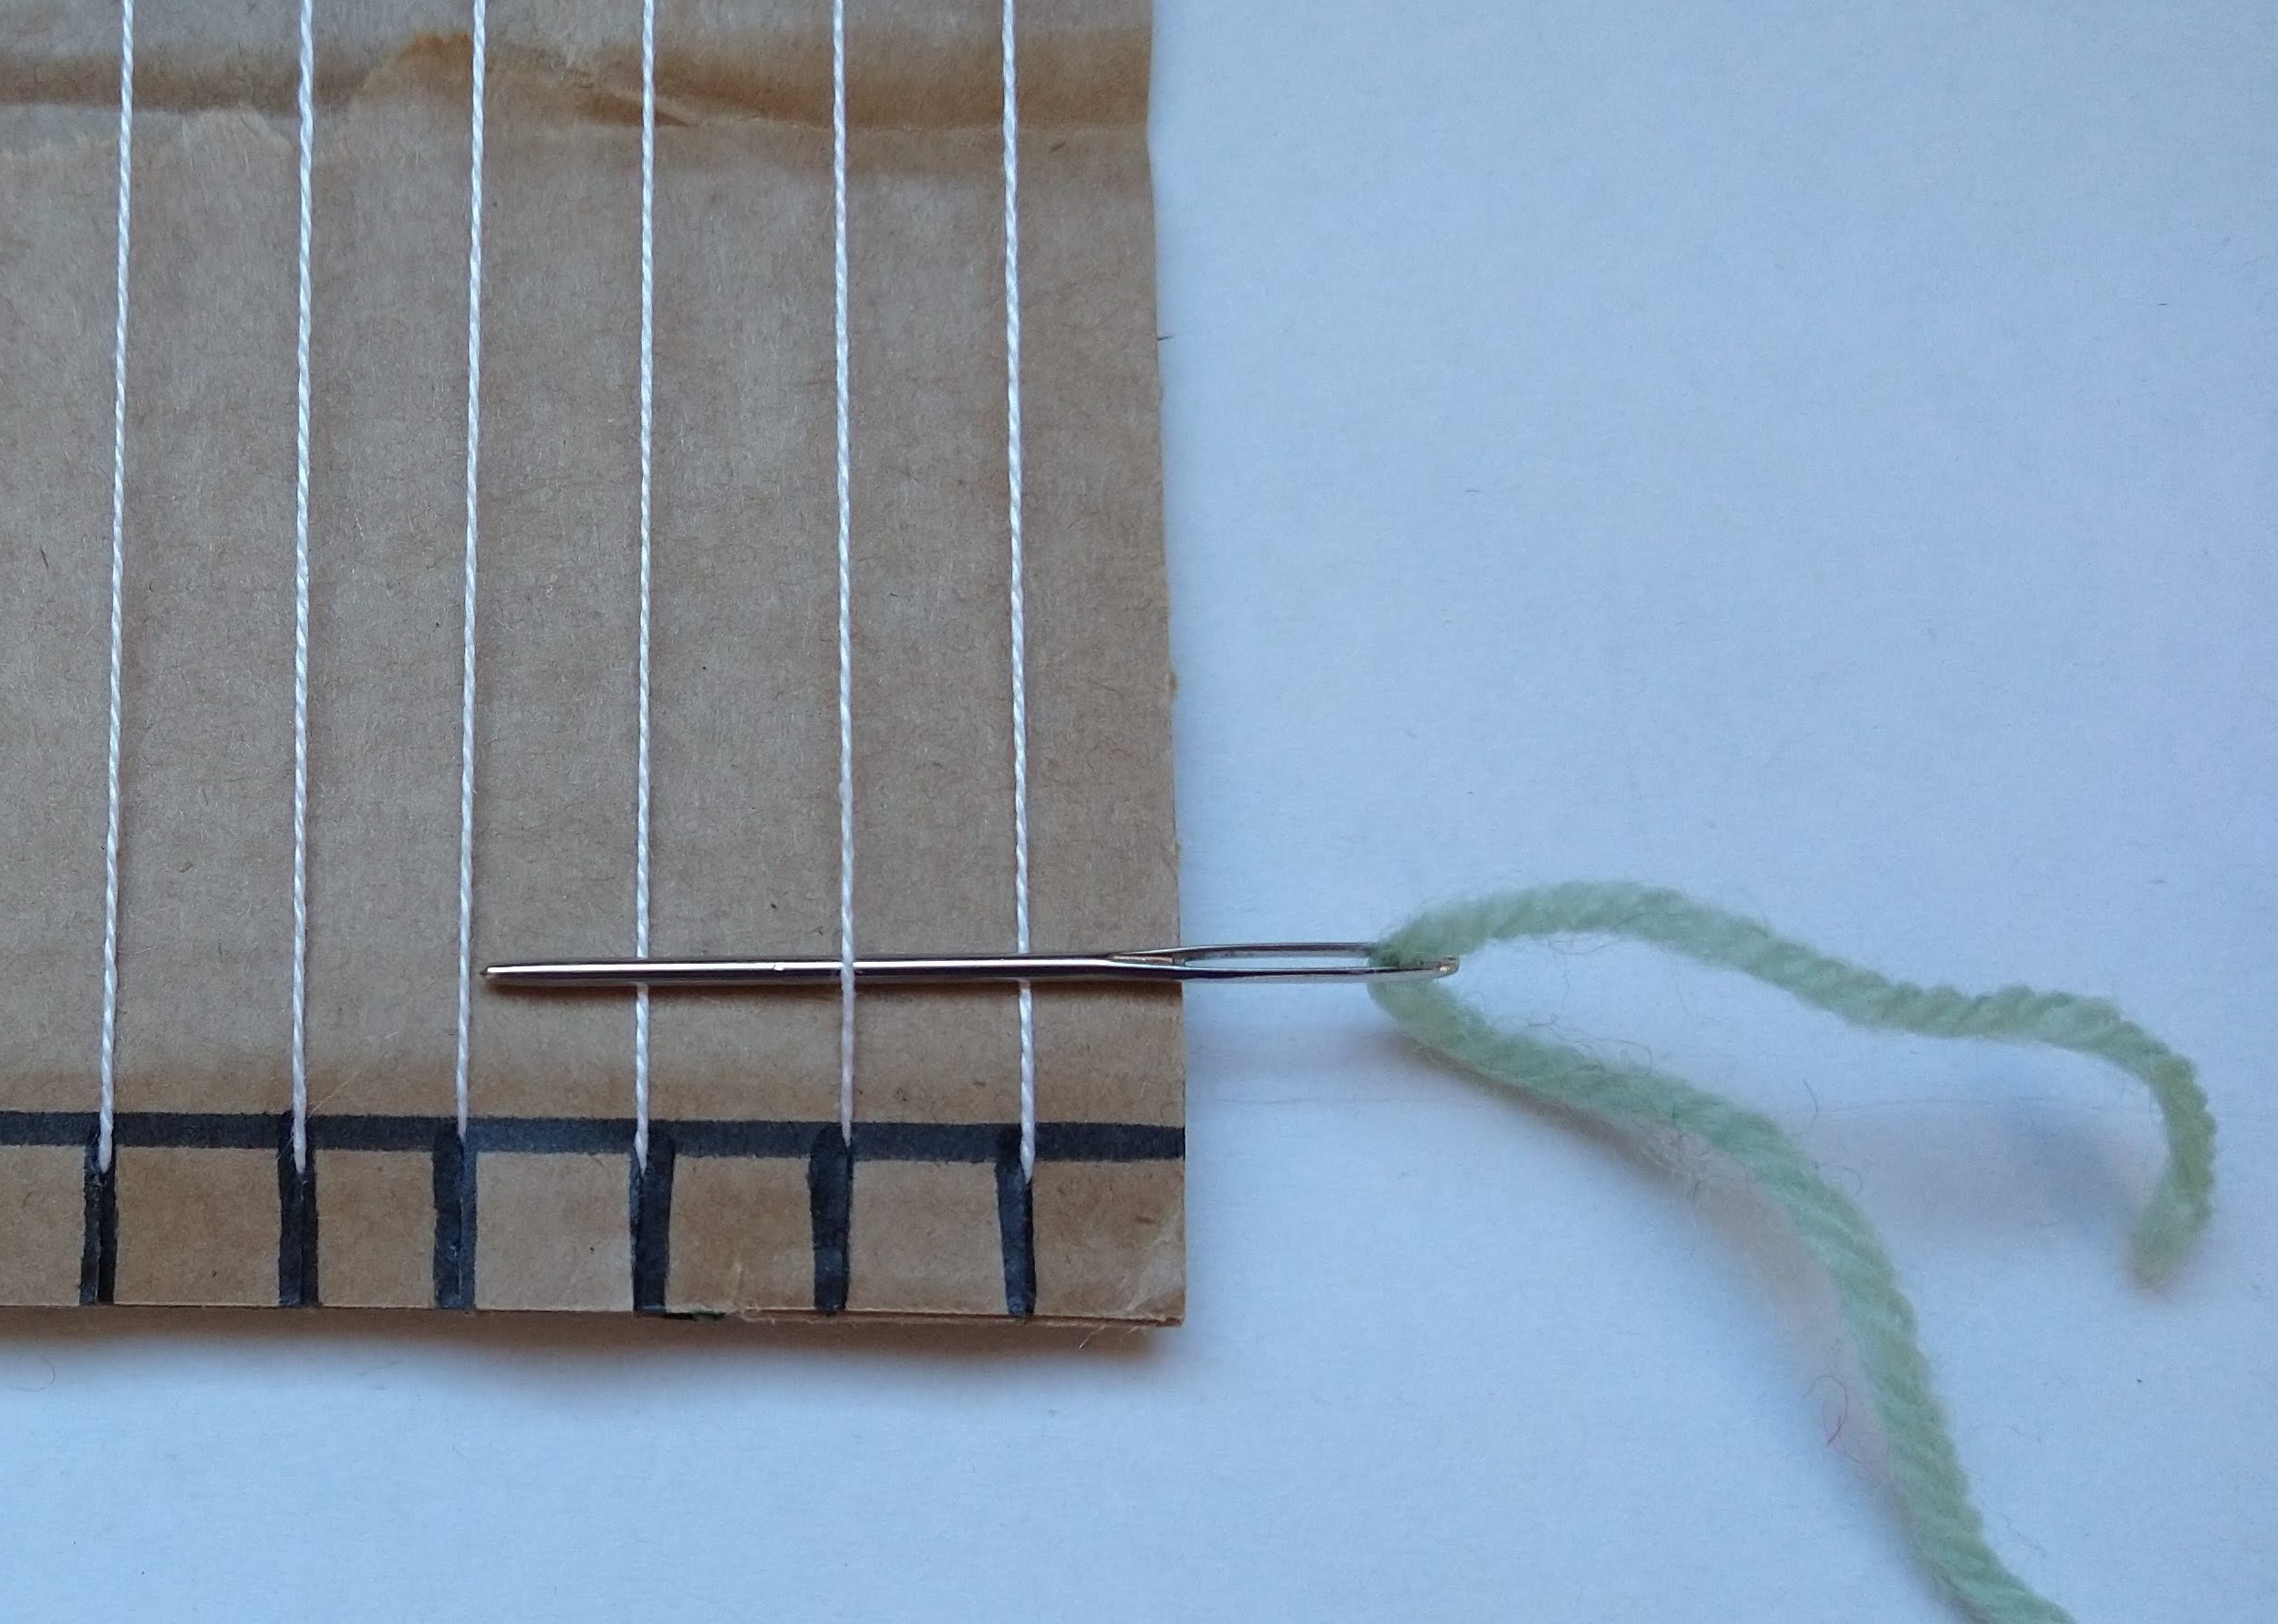


Line 1: Thread the bodkin/needle with the yarn and starting at one side of the loom work over one of the loom threads, under the next one, over the next one, under the next one and so on until you reach the other side. Leave an even amount of yarn loose on either side of the loom.
Step 5.


Line 2: Take another length of yarn (20 cm for us again) and this time weave under then over each thread, so that you’re doing the opposite to the line before (i.e. you go over the unders and under the overs.)
Step 6.
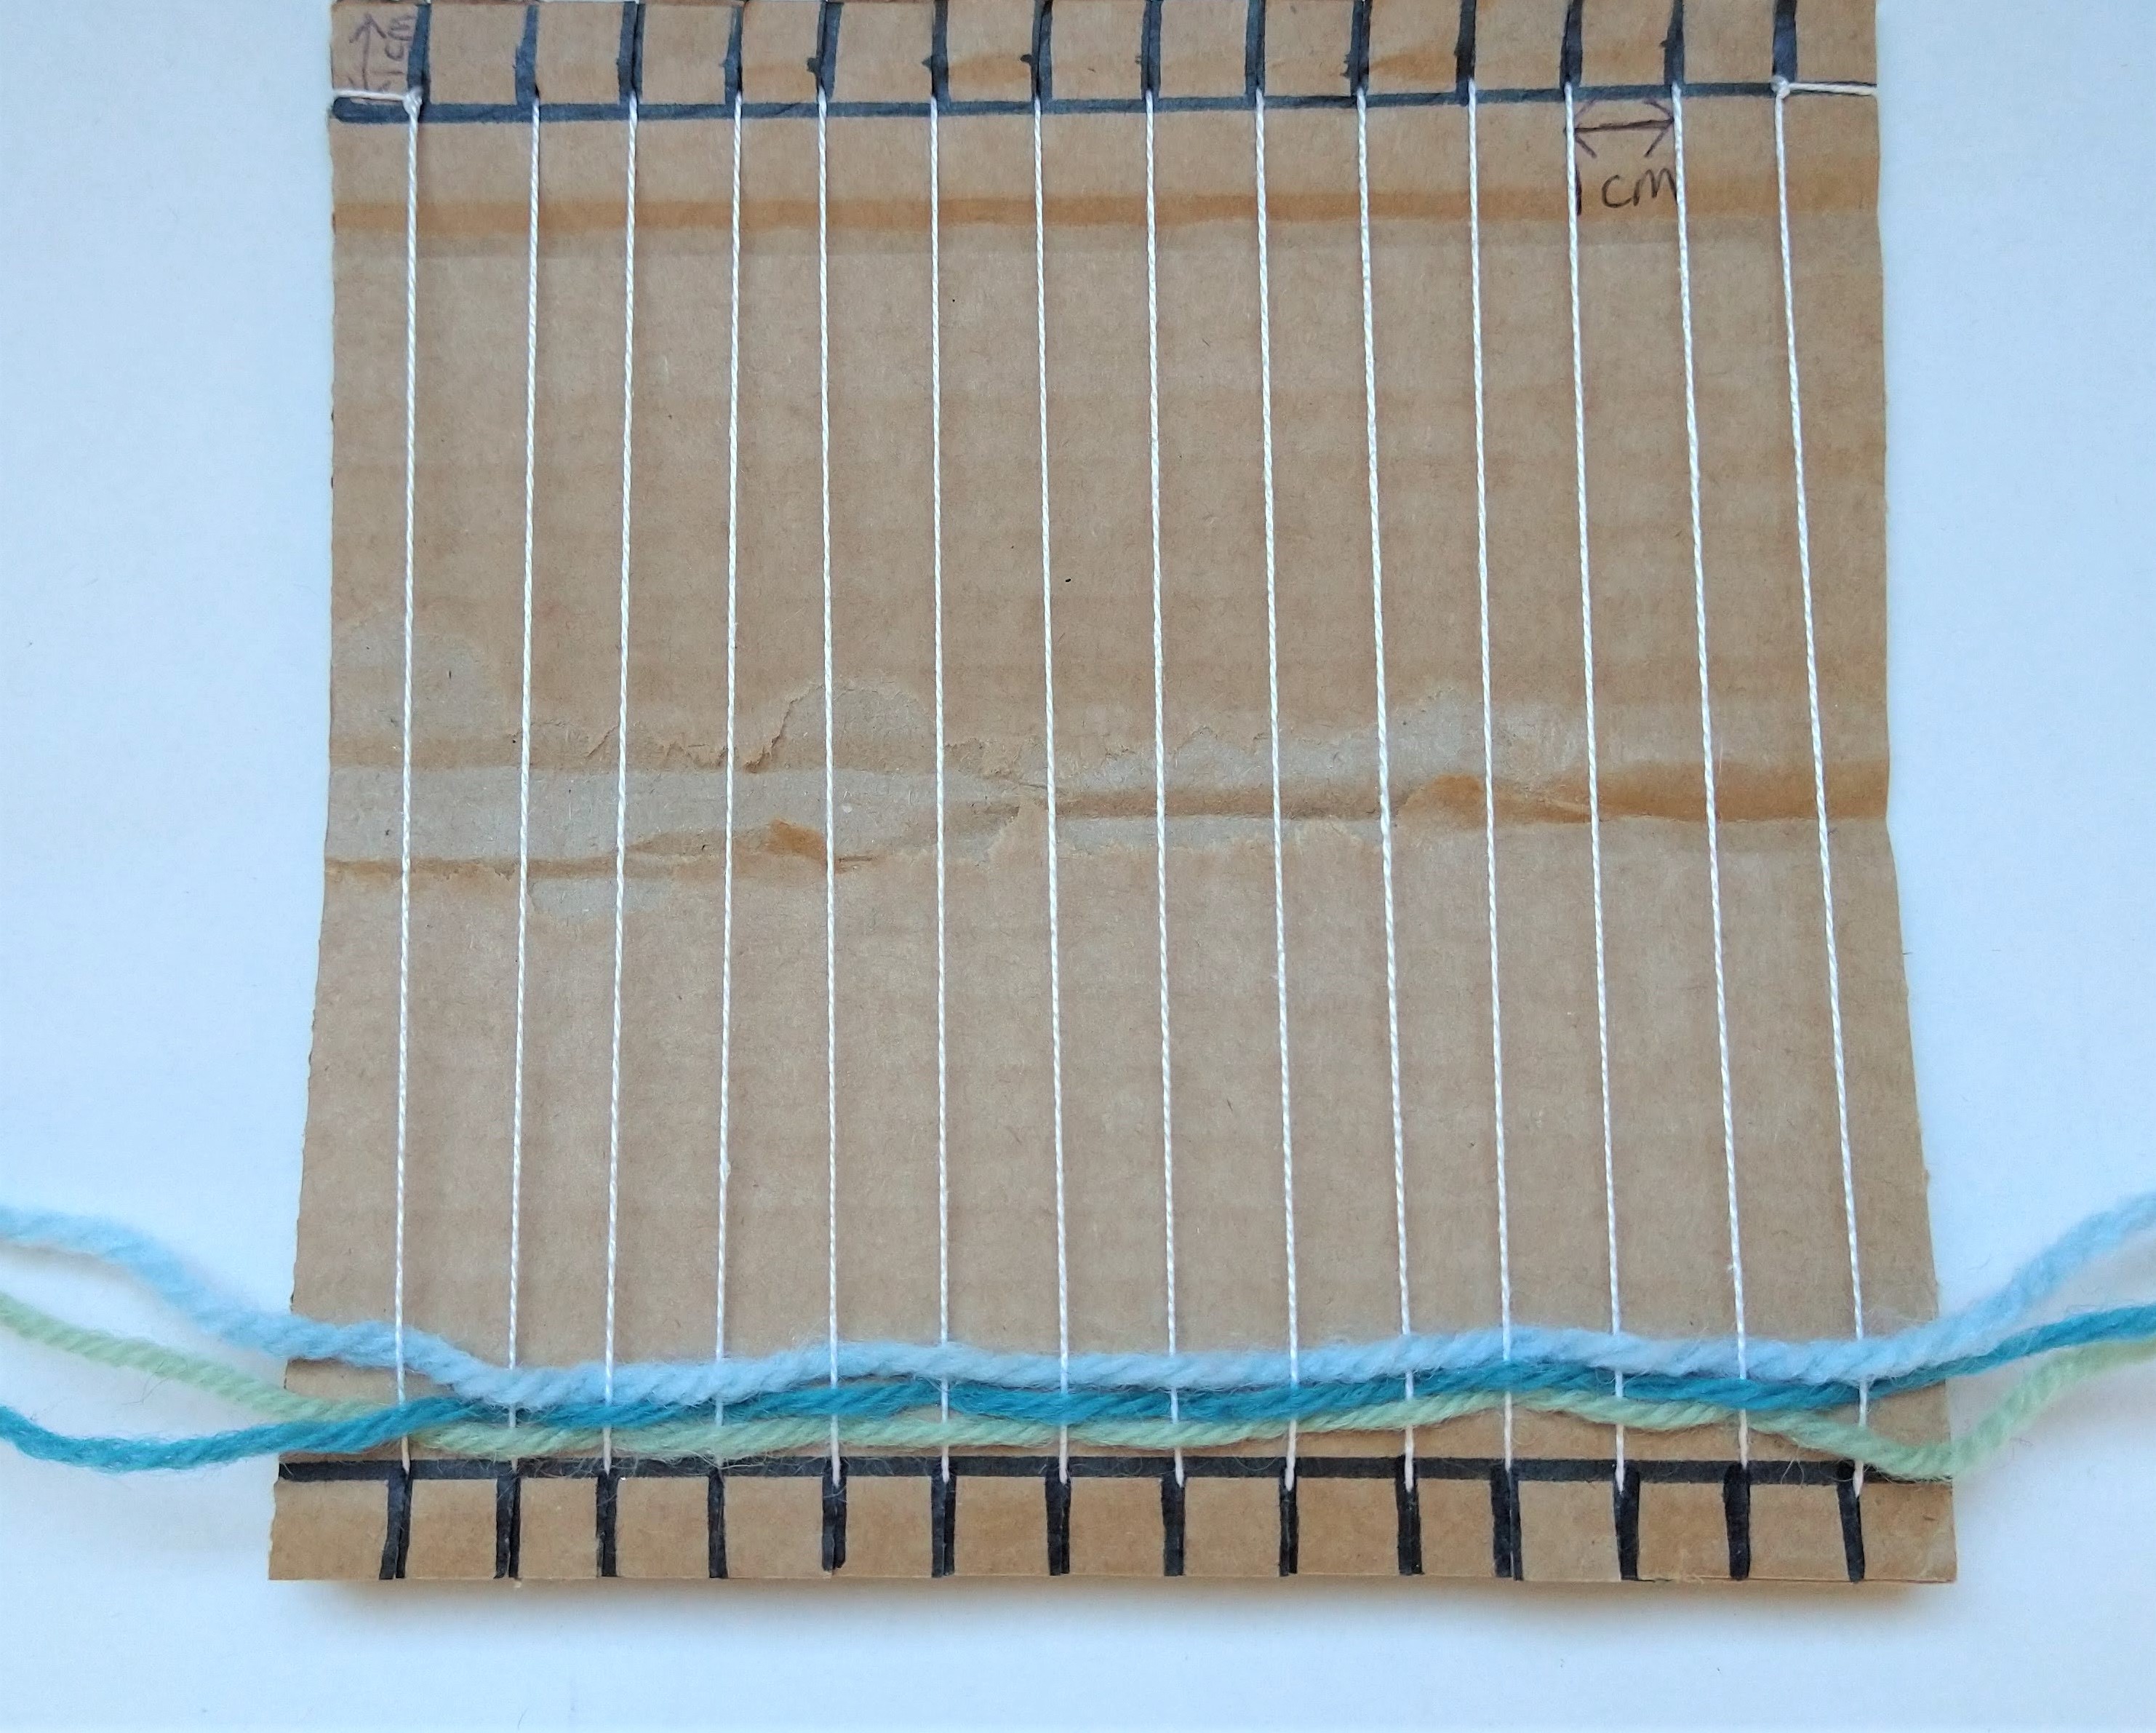


For the next row work the same as line 1 then the following row the same as line 2. Keep repeating these lines until your loom is full. Every few rows push the threads to the bottom of the loom so you get a nice tight weave.
Step 7.

As well as using yarn you can use strips of fabric, ribbon and pretty much anything linear! Experiment with different materials and see which effects you like best.
Step 8.


When your loom is full and you can’t fit anymore strips in then you can carefully lift the loops of the warp thread over the ‘posts’ of the loom. Tie the loose ends to one of the fringed ends to secure them. You can also trim the fringes if you want a neater edge.
Step 9.


Admire your hard work! Have fun and don’t forget to show us how you get on.
